
Hi there, fellow homeowner and DIY enthusiast! You've got a wonderful vision – a stunning stone patio, a welcoming walkway, or perhaps an elegant stone veneer gracing your home. The desire to bring that vision to life with your own hands is truly inspiring. Here at American-Stone.com, we understand that passion completely. There's a deep sense of accomplishment in crafting something enduring with natural stone.
Now, let's be honest with each other, the journey of a DIY stone project can sometimes have a few unexpected bumps along the way. We've had the privilege of seeing many enthusiastic homeowners, just like you, eager to transform their spaces, occasionally encounter some common challenges. And while your dedication is fantastic, these little stumbles can sometimes lead to frustration, extra expense, and a result that doesn't quite capture the beauty you were aiming for.
Think of your stone project as a meaningful endeavor. You, the determined homeowner, are on a mission to enhance your home. Your goal? A beautiful, long-lasting stone installation. But along the way, there can be some common pitfalls – the kind that can make the process feel a little more difficult than it needs to be.
But please know, we're here to offer our support and guidance. We genuinely believe in your ability to create something truly special with natural stone, and we want to share our experience to help you navigate these potential challenges smoothly. At American-Stone.com, we're not just about providing high-quality flagstone, durable pavers, and beautiful stone veneer; we're about empowering you with the knowledge to use them successfully and enjoy the process.
So, what are these common hurdles in the world of DIY stone installation that we often see? Let's gently explore the top three mistakes and, more importantly, how you can easily avoid them, ensuring your project unfolds into the beautiful success you're hoping for.
Mistake #1: Overlooking Proper Base Preparation – The Unseen Foundation That Matters
Imagine carefully placing beautiful plants in a garden bed with unprepared soil. They might look lovely at first, but without a good foundation, they won't thrive in the long run, will they? The same holds true for your stone project. Skipping the essential step of base preparation can unfortunately lead to an uneven, unstable surface, which can cause problems down the line.
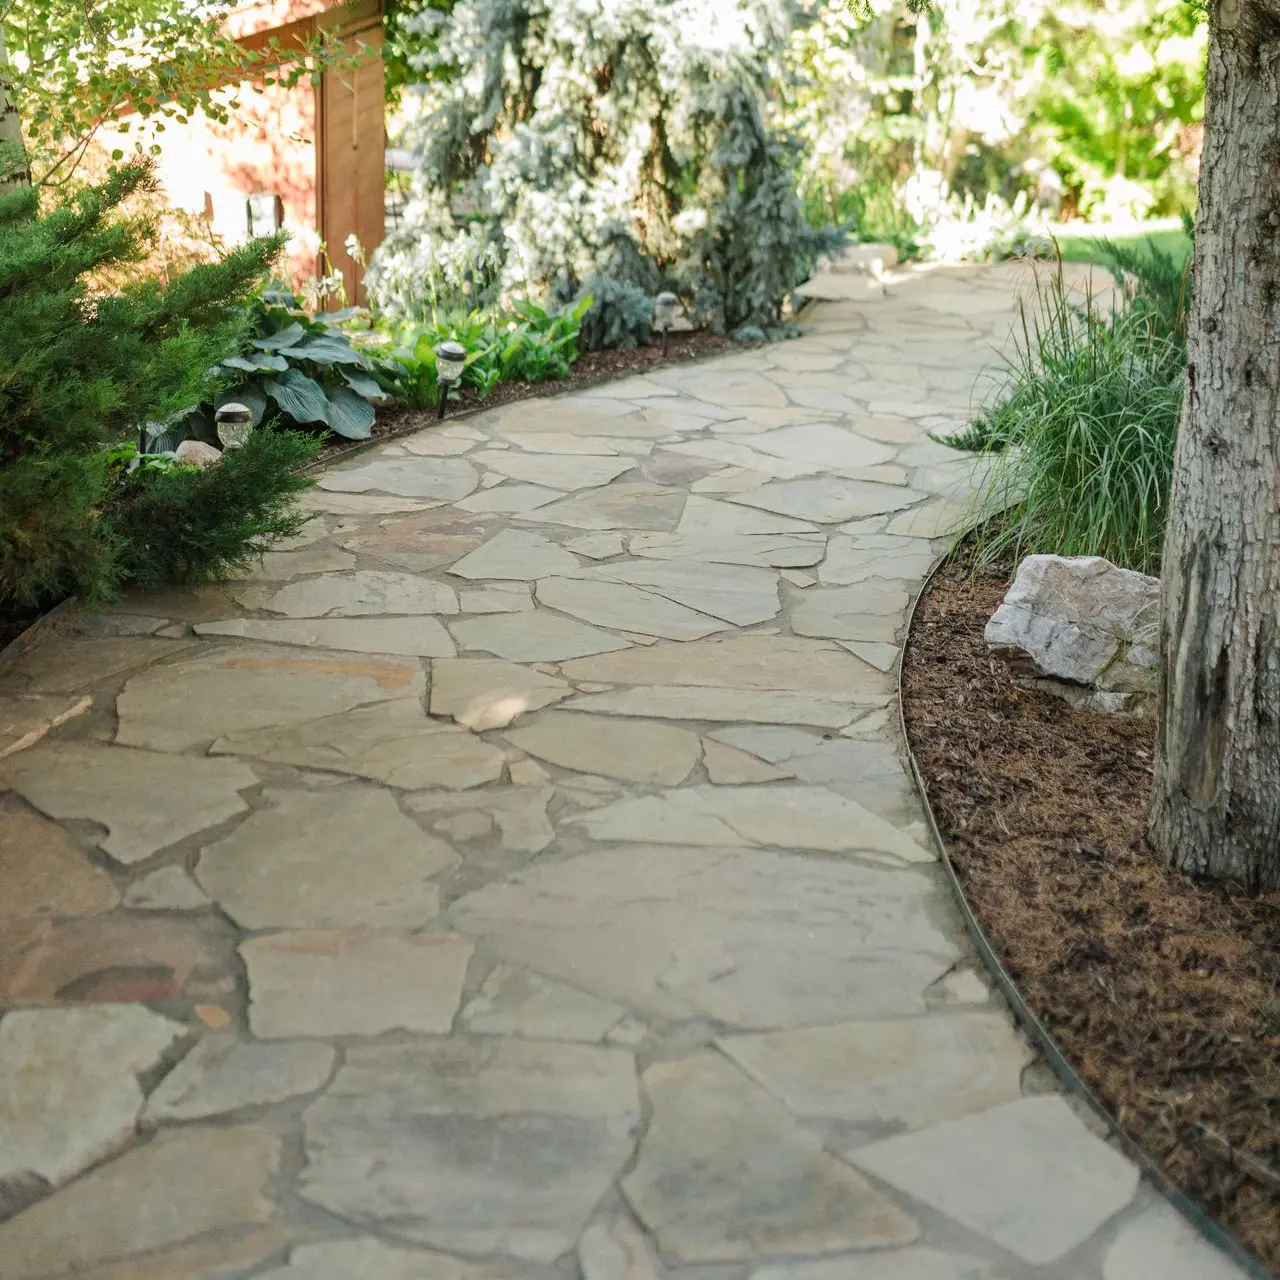
The Challenge: Without a well-prepared sub-base, your natural stone can shift, settle unevenly, and even develop cracks. This can not only detract from the appearance you were aiming for but also create tripping hazards and potentially require costly fixes. Picture that lovely flagstone patio you've been envisioning – imagine sections sinking or feeling wobbly after a season or two. That's likely not the outcome you're hoping for.
Why it Happens: Sometimes, in the excitement to see those beautiful stone pavers in place, the base preparation can feel like a less exciting, perhaps even unnecessary, step. It's the part that gets covered up, so it's easy to underestimate its vital role. Time pressures or a desire to conserve effort might also lead to this crucial stage being unintentionally rushed or skipped.
Our Supportive Solution: Building a Solid and Reliable Foundation
Think of your sub-base as the quiet hero of your stone project. It provides the stable, level support that your natural stone needs to last beautifully. Our first advise is that homeowners should only tackle a mortar setting if they have a lot of experience, you may want to consider hiring a pro if this is your situation, and American Stone can help you find a qualified contractor. For most projects there are other options that will make the your project come together as you you’ve hoped. Also remember that a Mortar set is usually used for high traffic areas that will have vehicles driving and parking on. That said, let’s concentrate on projects that are not mortar set.
Here’s how to ensure you get it right, step by step:
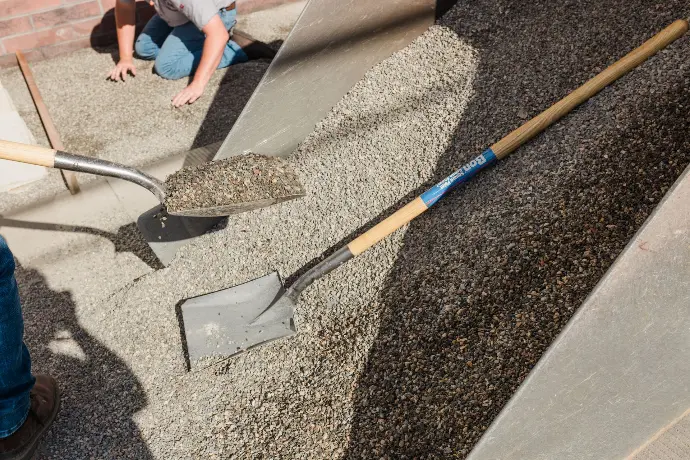
- Careful Excavation: Determine the necessary depth for your project. This will depend on factors like the type of stone, how the area will be used (walking vs. driving), and the climate in your area (considering potential frost heave). Generally, for walkways and patios, excavating at least 4” inches is a good starting point. For driveways, or projects that need extra consideration for drainage, this depth will need to be considerably more.
- The Importance of Compaction: Once you've excavated, it's time to compact the existing soil. Renting a plate compactor is a worthwhile investment – this tool will help create a dense, stable base. Compact in layers, typically 2-3 inches at a time, for the best results. This helps prevent future settling and provides a firm base for the layers above.
- Adding Stability with Aggregate: Next comes the aggregate base – usually crushed crushed stone or chat. (Chat is a term for fragments of siliceous rock, often described as "small gravel" that's larger than sand but smaller than pea gravel. Chat is sometimes used interchangeably with terms like "rock dust," "crusher fines," or "decomposed granite," depending on the region and specific context.) This layer aids in drainage and adds further stability. The thickness of this layer will vary depending on your project, but around 2-4” inches is generally recommended for most patios and walkways.
- Achieving a Level Surface: After spreading the aggregate, take the time to ensure it's perfectly level. Using a level and screed boards will help you create a smooth, even surface. This is so important for making sure your stone pavers or flagstone lie flat and don't rock or become uneven.
- Weed Barrier: When adding a nice pebble or other round cover or joint materials you will want to protect your investment from sinking as the dirt settles- and of course this will help with weed prevention. It is a good idea to place this after your base but before you sand.
- Add a Layer of Sand: A layer of leveling sand (about 1-2” inches) placed on top of the compacted aggregate will be your next step. This provides a fine-tuning layer for setting your natural stone and can help prevent movement.
Find our options here: Ground Cover & Weed Barrier
Mistake #2: Choosing the Wrong Stone – Ensuring the Right Fit for Your Project
Imagine selecting a delicate indoor rug for a muddy entryway. It might look lovely initially, but it wouldn't hold up to the wear and tear, would it? Similarly, using the wrong type of natural stone for your project can unfortunately lead to safety concerns, durability issues, and ultimately, a result that doesn't meet your expectations.
The Challenge: Different types of natural stone possess unique characteristics in terms of strength, how porous they are, their resistance to weather, and their suitability for various applications. Using a stone that isn't designed for your specific needs can result in cracking, chipping, staining, premature deterioration, and even surfaces that become slippery when wet.
Why it Happens: The wide array of beautiful natural stone available at places like American-Stone.com can be both inspiring and potentially a little overwhelming. Sometimes, choices are made based primarily on appearance or initial cost without fully considering the practical requirements of the project. Misunderstanding the properties of different stone types can also contribute to this challenge.
Our Supportive Solution: Selecting Your Stone Thoughtfully
Think of selecting the right natural stone as choosing the best materials for a lasting creation. Each type of stone has its own unique strengths and is best suited for particular uses. Here's how to make an informed decision that you'll feel confident about:
- Understanding Your Project's Needs: What will the stone be used for? Will it be a walkway, a patio, a driveway, or a wall? Will it need to withstand a lot of foot traffic, vehicles, or exposure to different weather conditions? Clearly defining the demands of your project is the first important step.
- Getting to Know Your Stone Options: Take some time to learn about the different types of natural stone available, such as natural stone vs. concrete pavers, which offer a different look and price point. Limestone, sandstone, granite, or slate each has its own set of characteristics.
- Limestone: Offers a classic, elegant aesthetic and is suitable for patios, walkways, and walls in climates that aren't too harsh. It can be more porous than granite.
- Sandstone: Provides a warm, natural look but can be softer and more porous, often requiring sealing for outdoor use. At American Stone we have Quartzitic sandstone products such as Cherokee red or Sunrise—these are usually around
90% quartz and provide a hardness that works perfectly for patios and pathways and give you the great color and feel of sandstone. - Slate: A fine-grained stone that is naturally slip-resistant, making it a good option for walkways and patios, though some varieties can be prone to flaking, Our Slate products can be found in our Vancouver Location, but easily found in Utah.
- Granite: Known for its exceptional strength and resistance to weathering and stains, it may be a great choice for high-traffic areas, but it often much more expensive than other options.
- Considering Durability and Your Climate: If you live in an area with significant temperature changes and freeze-thaw cycles, it's wise to choose a stone known for its durability and resistance to cracking and spalling. More porous stones might benefit from sealing to protect them from water absorption and potential damage.
- Thinking About Safety: For walkways and patios, consider the texture of the stone, especially when wet. Some stones can become quite slippery. Look for options with a naturally rough or textured surface, or explore sealants that offer slip resistance.
- Leaning on Our Expertise at American-Stone.com: Please don't hesitate to reach out to our knowledgeable team. We're here to offer guidance based on your specific project needs and help you select the perfect natural stone to ensure both beauty and long-term satisfaction. We want to help you avoid the frustration of choosing the wrong material and guide you toward a lasting success.
See our options of Natural Stone Selection here:
-Boulders & Steps
-Patio Stone - Flagstone
-Natural Thin Stone Veneer and more!
Mistake #3: Neglecting Proper Joint Material – Helping Prevent Weeds and Erosion
Imagine carefully piecing together a beautiful mosaic, only to have the spaces between the tiles fill with dust and debris. The choice of joint material in your stone patio or walkway might seem like a small detail, but it plays a significant role in the overall look, stability, and how long your natural stone installation will last.
The Challenge: Using the wrong type of joint material or not installing it correctly can unfortunately lead to several issues. Weeds can quickly take root, detracting from the beauty of your hard work and potentially even damaging the surrounding stones. Erosion can occur, causing the joint material to wash away, leading to loose stones and an unstable surface. Even little things like ants can find their way into poorly filled joints.
Why it Happens: Sometimes, DIYers might opt for the most readily available or least expensive joint filling method without fully realizing the long-term consequences. Simple sand, for example, while easy to apply initially, often doesn't provide the stability or weed resistance needed. A lack of awareness about the different types of joint materials available and their specific benefits can also lead to this oversight.
Our Supportive Solution: Filling the Spaces for Lasting Beauty and Stability
Think of your joint material as the element that brings everything together in your stone project. It not only fills the spaces between your natural stone but also contributes to stability, helps prevent weed growth, and resists erosion. Here's how to choose and apply it effectively:
- Understanding Your Options: There are several types of joint materials commonly used for natural stone installations:
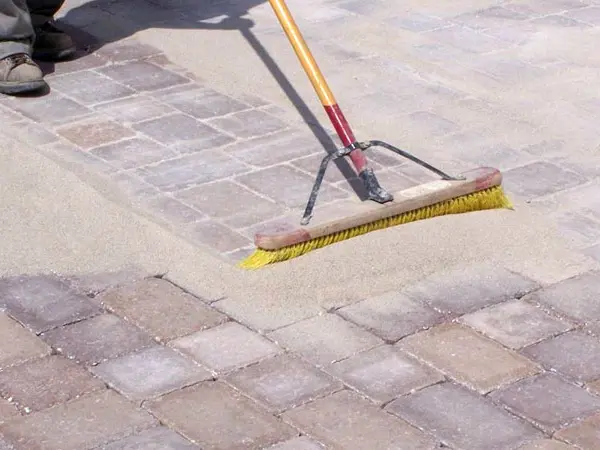
- Polymeric Sand: This is a popular and often effective choice for patios and walkways made with pavers or flagstone. It's a blend of fine sand and polymers that, when activated with water, bind together to create a firm, weed-resistant joint. It offers good flexibility and durability.
- Mortar: A more traditional option for installations where a strong, rigid joint is desired. It requires careful mixing and application and is often used for stone walls and more formal patios. Again we recommend a professional or only for seasoned DIYers.
- Decorative Ground Cover or Crushed Stone: For some informal pathways or areas with good drainage, crushed stone can be used as a joint filler. However, it typically offers less weed resistance and stability compared to polymeric sand or mortar.
- Chat or Decomposed Granite: This fine, gravel-like material can be used for pathways and patios, offering a natural look. It requires compaction and may need to be replenished over time.
- Dirt, wood chip or planting: Often a natural looking path through a garden or similar type area is the look you are going for. There can be many ways of setting patio stone. You’ll need to plan your project for the look you are after.
- Choosing the Right Material for Your Project: Consider the type of natural stone you're using, the width of the joints between the stones, the amount of foot traffic the area will receive, and the overall look you want to achieve. For most paver and flagstone patios and walkways, polymeric sand is often a great choice due to its ease of use and weed-resistant qualities. For more formal installations or wider joints, mortar might be a better fit.
- Paying Attention to Proper Application: It's important to follow the manufacturer's instructions carefully when applying your chosen joint material.
- Polymeric Sand: Typically involves sweeping the sand into the joints, gently compacting it, and then watering it to activate the binding polymers. Be careful not wash away the sand, but by liberally applying water or “flooding” the area will harden the chat and the polymeric sand and create solid joints.
- Mortar: Requires careful mixing to the correct consistency and then using a pointing trowel to fill the joints smoothly and evenly. Any excess mortar should be cleaned off promptly. Again, we recommend the normal weekend warrior hire a professional for mortar set projects.
- Sealants: At American Stone we have great selection of sealants that will help secure your joints. This a great way to finish you project and provide more stability and durability.
- Considering Joint Width: The width of the spaces between your stones will influence the type of material you can effectively use and the final appearance of your project. Wider joints may require more robust materials.
By paying attention to the details of your joint material, you're not just filling spaces; you're contributing to the long-term beauty and stability of your natural stone creation. You're helping to prevent unwanted weeds and protecting your investment from the effects of erosion.
Get Your Proper Joint Material Here: Cleaners - Sealers - Tools
Your Stone Project: Creating Something Beautiful and Lasting
Embarking on a DIY stone project is a truly rewarding experience. By understanding and thoughtfully avoiding these top three common mistakes – overlooking proper base prep, choosing the wrong stone, and neglecting proper joint material – you're setting yourself up for a successful and deeply satisfying outcome.
Please remember, here at American-Stone.com, we offer more than just high-quality natural stone including Storm Mountain, Autumn Gold, Buckskin, or Cherokee Red. We see ourselves as your partners in bringing your unique vision to life. We have confidence in your ability to create beautiful and enduring spaces, and we're here to provide the materials, knowledge, and ongoing support you might need along the way.
Also please be aware, If you choose to use manufactured or concrete pavers, your base is much more important to compact and level. Uneven base will create wobbling pavers and edges that become tripping hazard.
So, take your time, plan carefully, choose your materials wisely, and build with confidence. Your stone project has the potential to become a beautiful and lasting part of your home. And when you choose American-Stone.com, you're choosing quality, durability, and a supportive partner for your creative journey.
Explore our selection of premium natural stone at American-Stone.com and let's get started on your project together!
Building Your Dream Stone Project: Avoiding Common DIY Setbacks